REST API - Quick Start
1. Create an account
If you don't have a Teenvio account, you'll need to create one for free
2. Create a Token
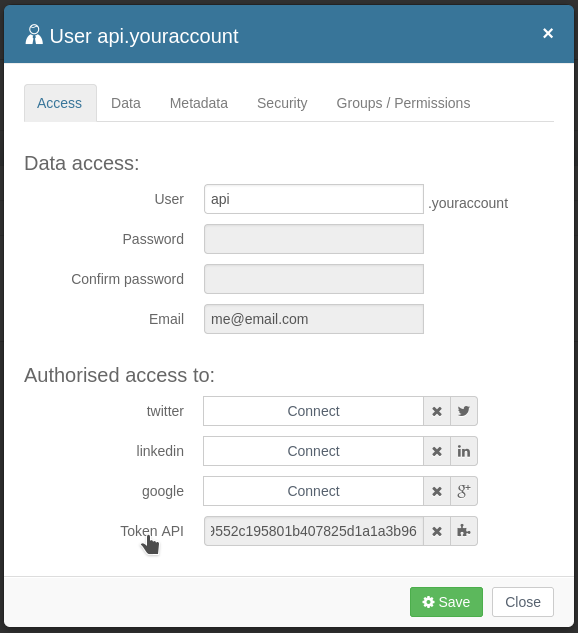
Create a new user for api and generate a token. Is important configure the Security and Permissions. For API users the "api" permission is required.
3. Launch a test
Now you can launch a first API request: for example, get the current API version:
| export TE_TOKEN='Your token'
curl -X GET https://app.teenvio.com/v4/public/api/rest/v3/version/ \
-H "X-Token: $TE_TOKEN" \
-H "Accept: application/json"
|
| <?php
$token = 'Your token';
$url_base = 'https://app.teenvio.com/v4/public/api/rest/v3'
$curl = curl_init();
curl_setopt_array($curl, array(
CURLOPT_CUSTOMREQUEST => 'GET',
CURLOPT_URL => $url_base.'/version/',
CURLOPT_RETURNTRANSFER => true,
CURLOPT_HTTPHEADER => array(
'Accept: application/json',
'X-Token: '.$token
),
));
$response = curl_exec($curl);
curl_close($curl);
echo $response;
|
| import requests
token = 'Your token'
url_base = 'https://app.teenvio.com/v4/public/api/rest/v3'
my_headers = {
'Accept' : 'application/json',
'X-Token' : token
}
response = requests.get(url_base+"/version/", headers=my_headers)
print(response.json())
|
| const axios= require('axios');
const token = 'Your token';
const url_base = 'https://app.teenvio.com/v4/public/api/rest/v3';
const my_headers = {
'Accept' : 'application/json',
'X-Token' : token
};
axios.get(url_base+'/version', {headers:my_headers}).then( resp => {
console.log(resp.data);
});
|
Response:
{
  "action": "get_version",
  "time": "2022-10-20 15:00:09",
  "status": "OK",
  "response": "v3.0-202206",
  "code": 0
}